Photoshop tutorial
How to create a winter night scene wallpaper.
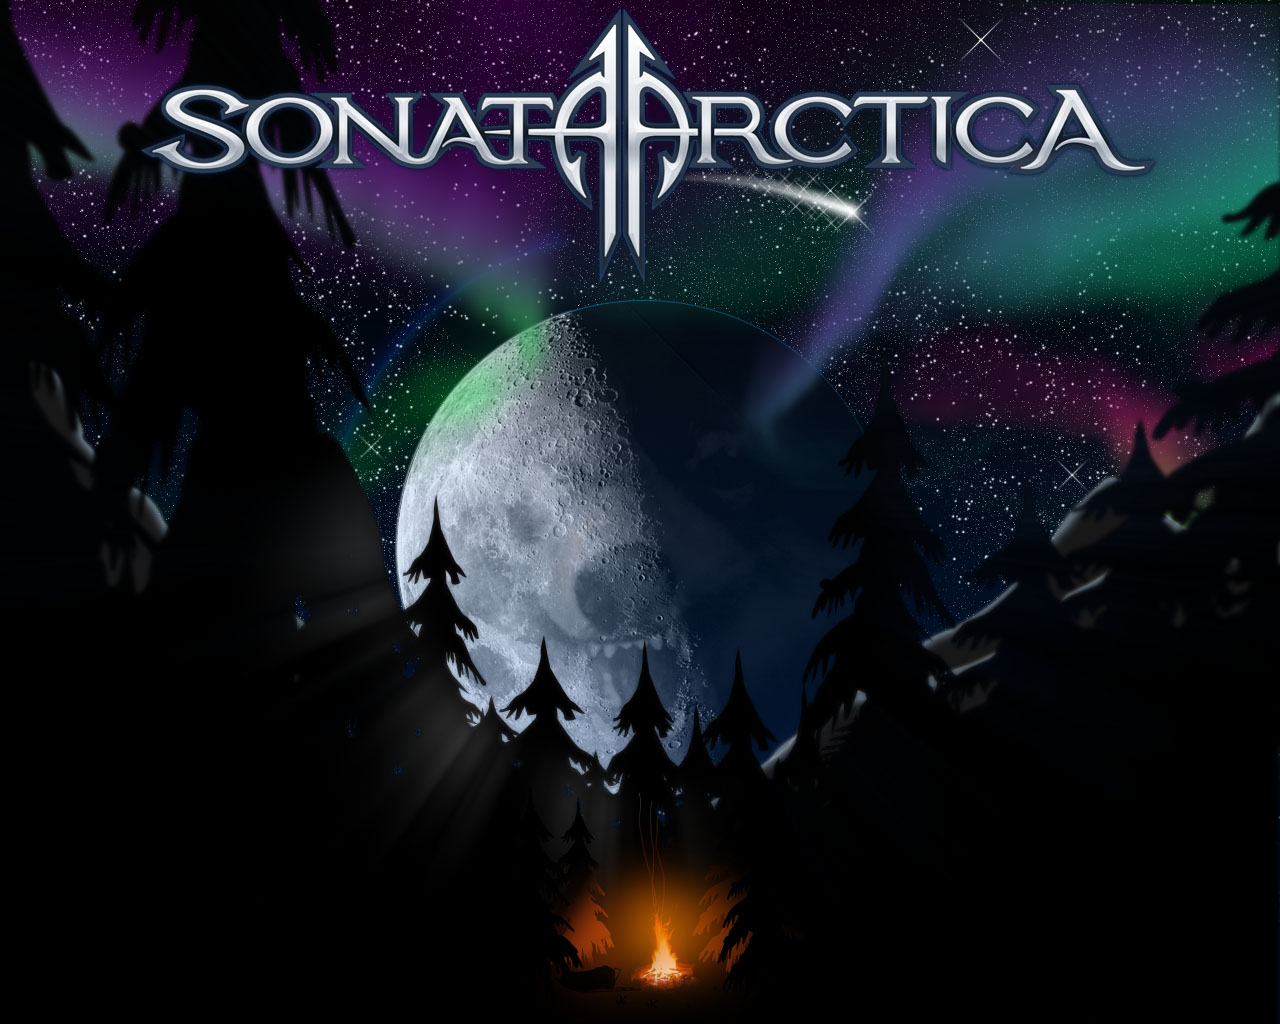
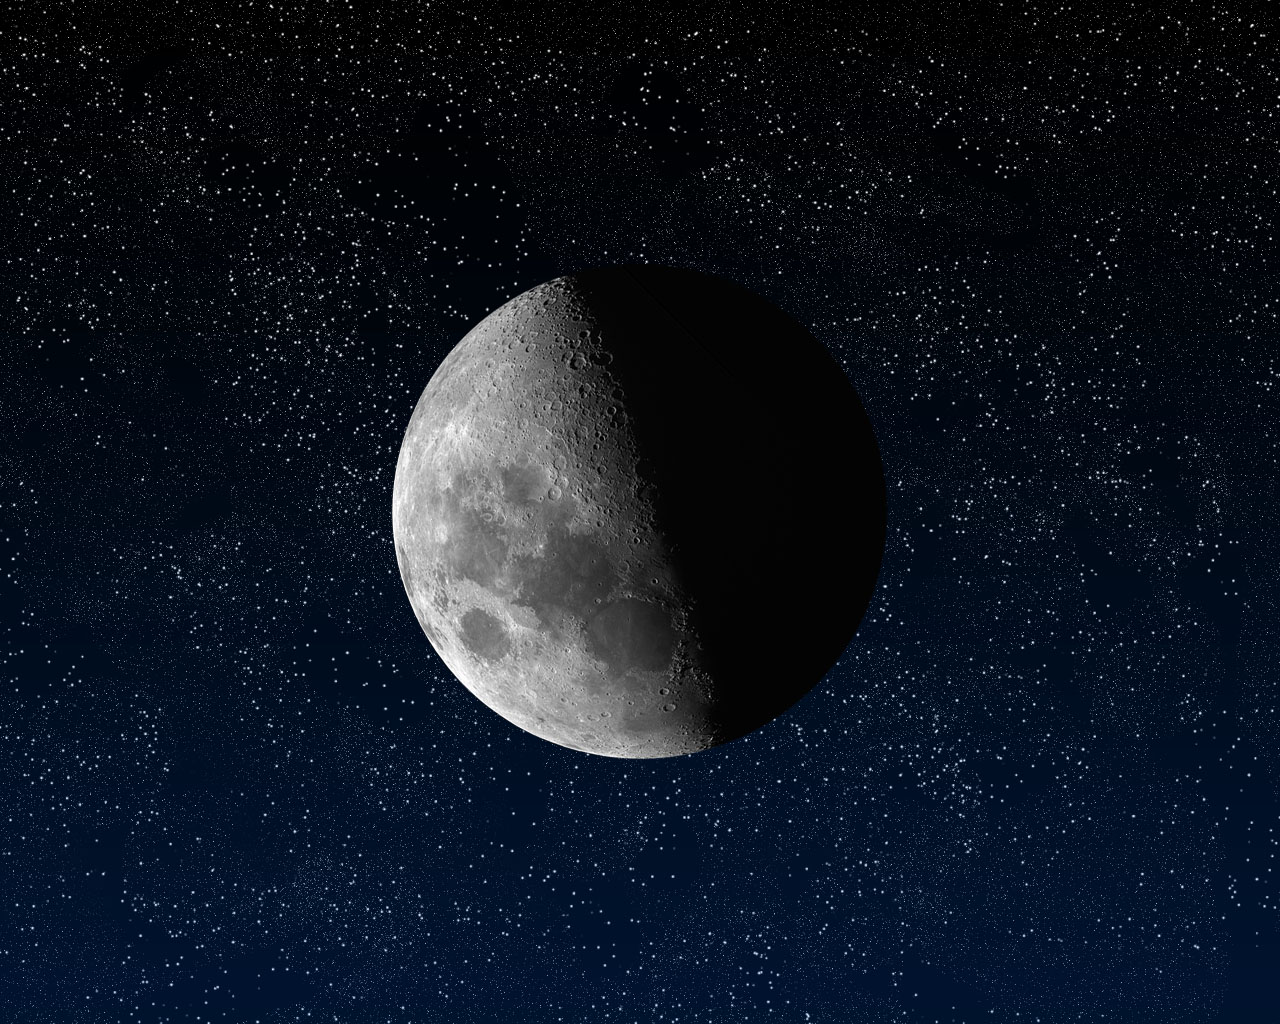
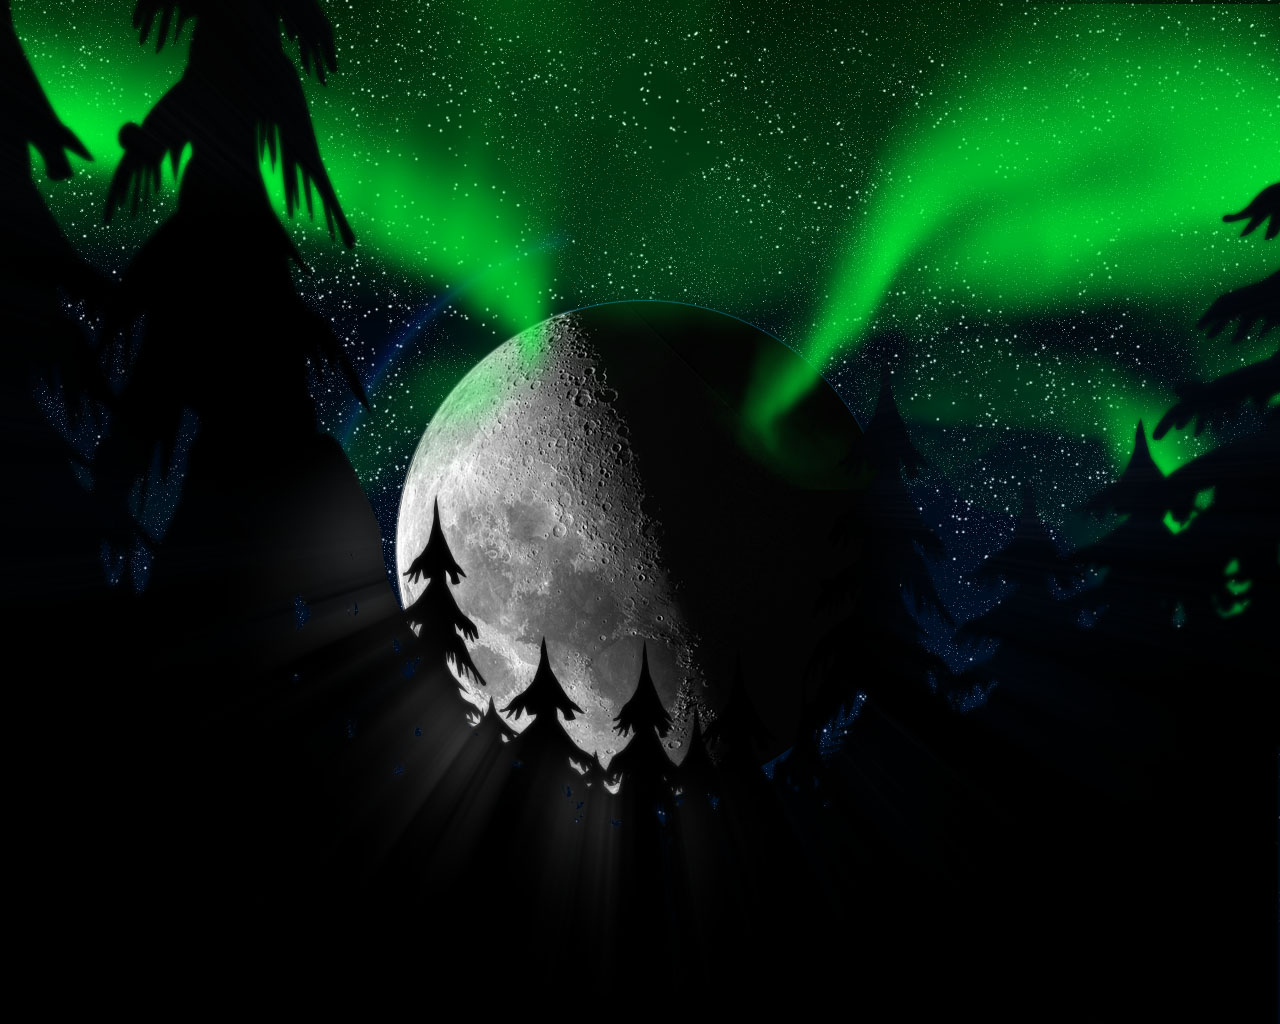
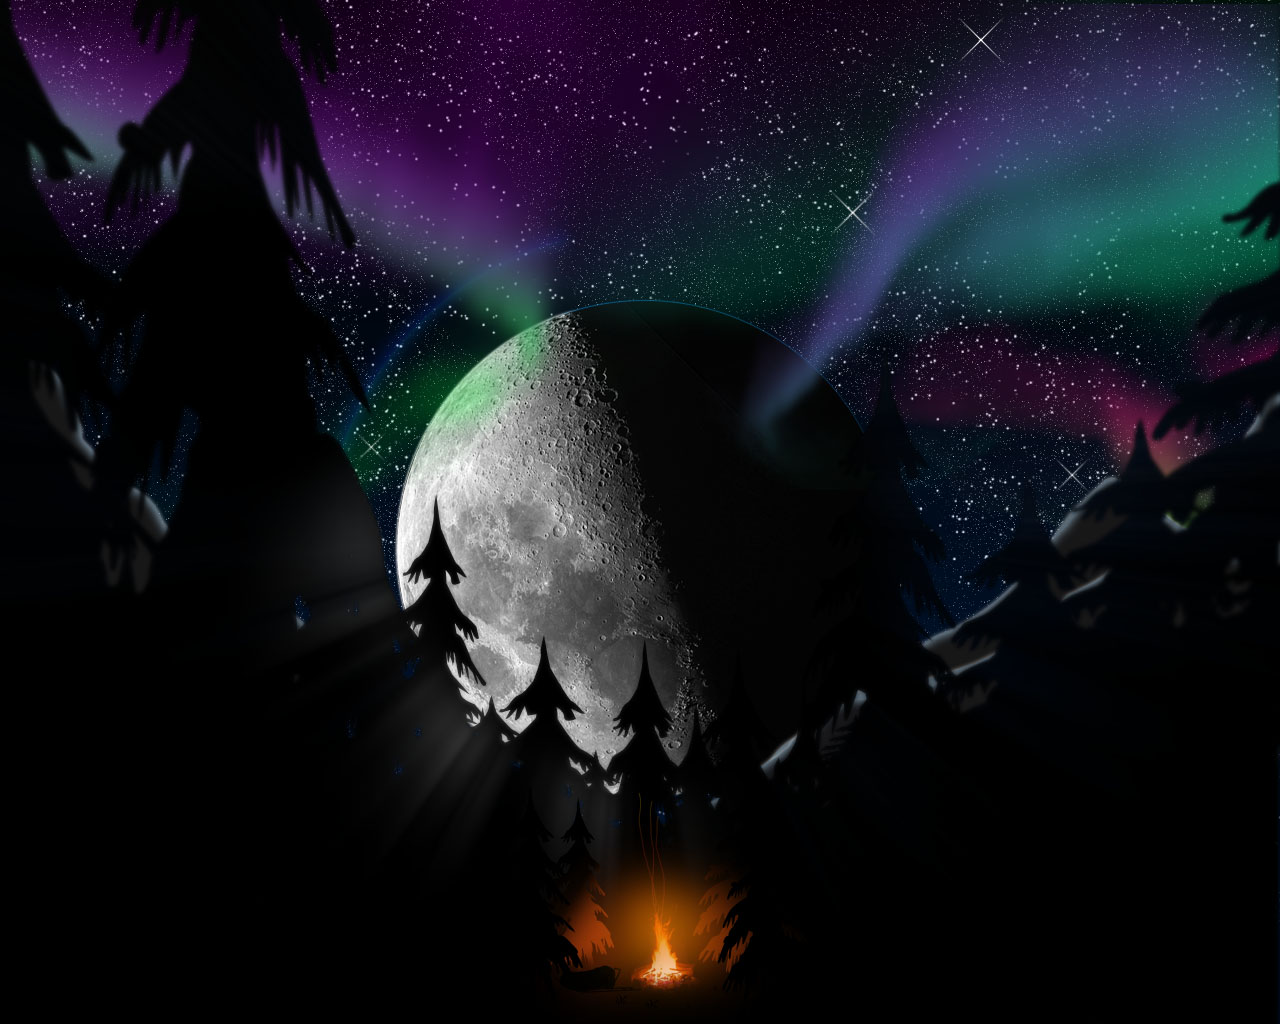
In this tutorial I will explain in detail how to create this picture:
You can do this tutorial with Photoshop CS3, but I think that older or newer versions are also suitable. The totorial is quite long and detailed, it is written for beginners. So if you are a skilled Photoshopper this might be annoying. The time it takes to complete, depends on your skils but I guess it will take ca. 3 hours. If you have any question, you can post a comment at the bottom of this page.
Step 1, Starry sky
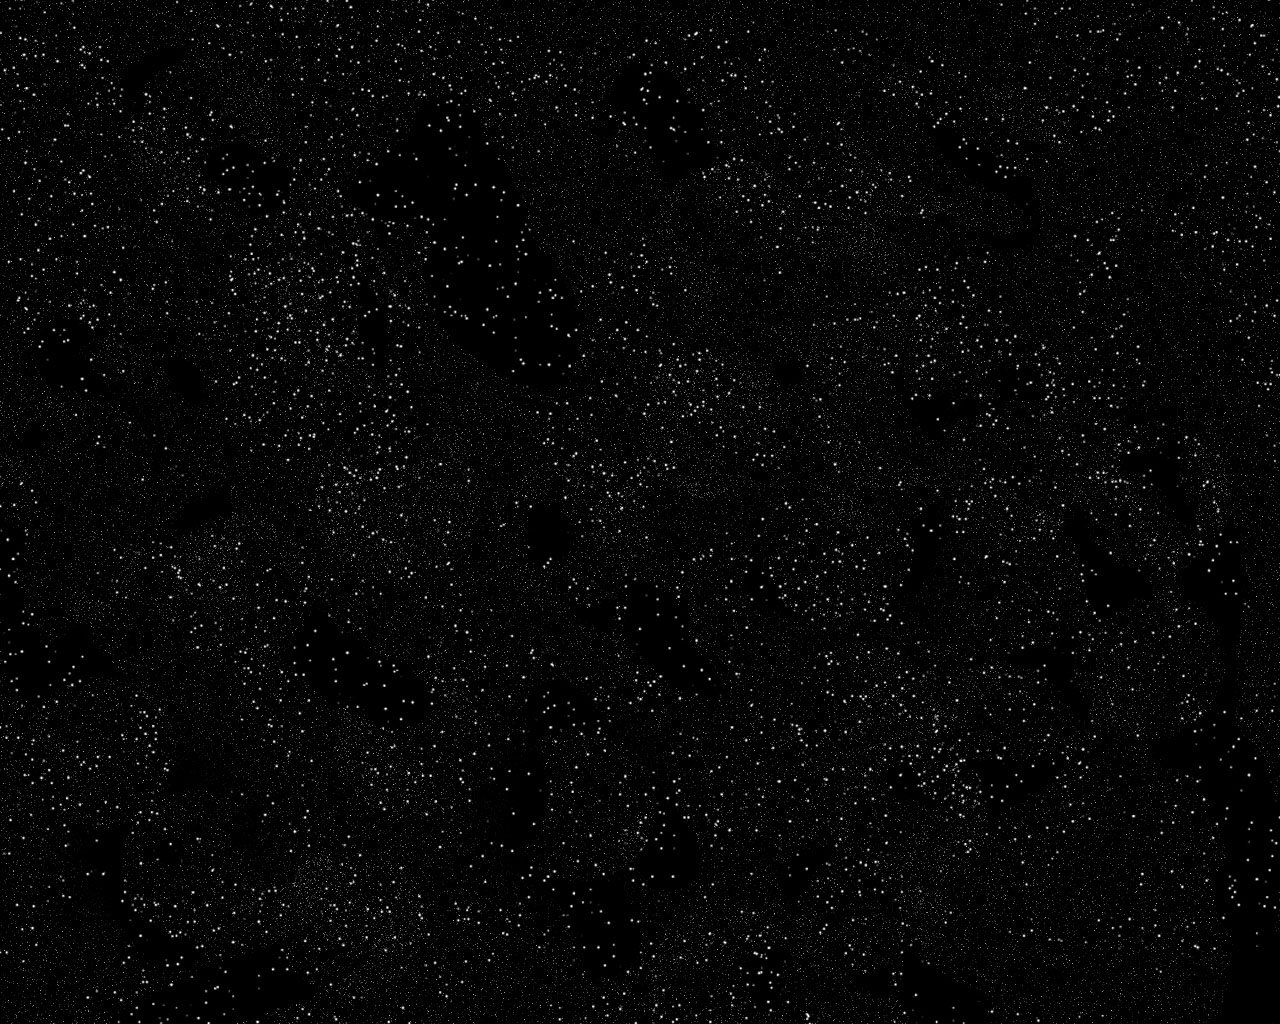
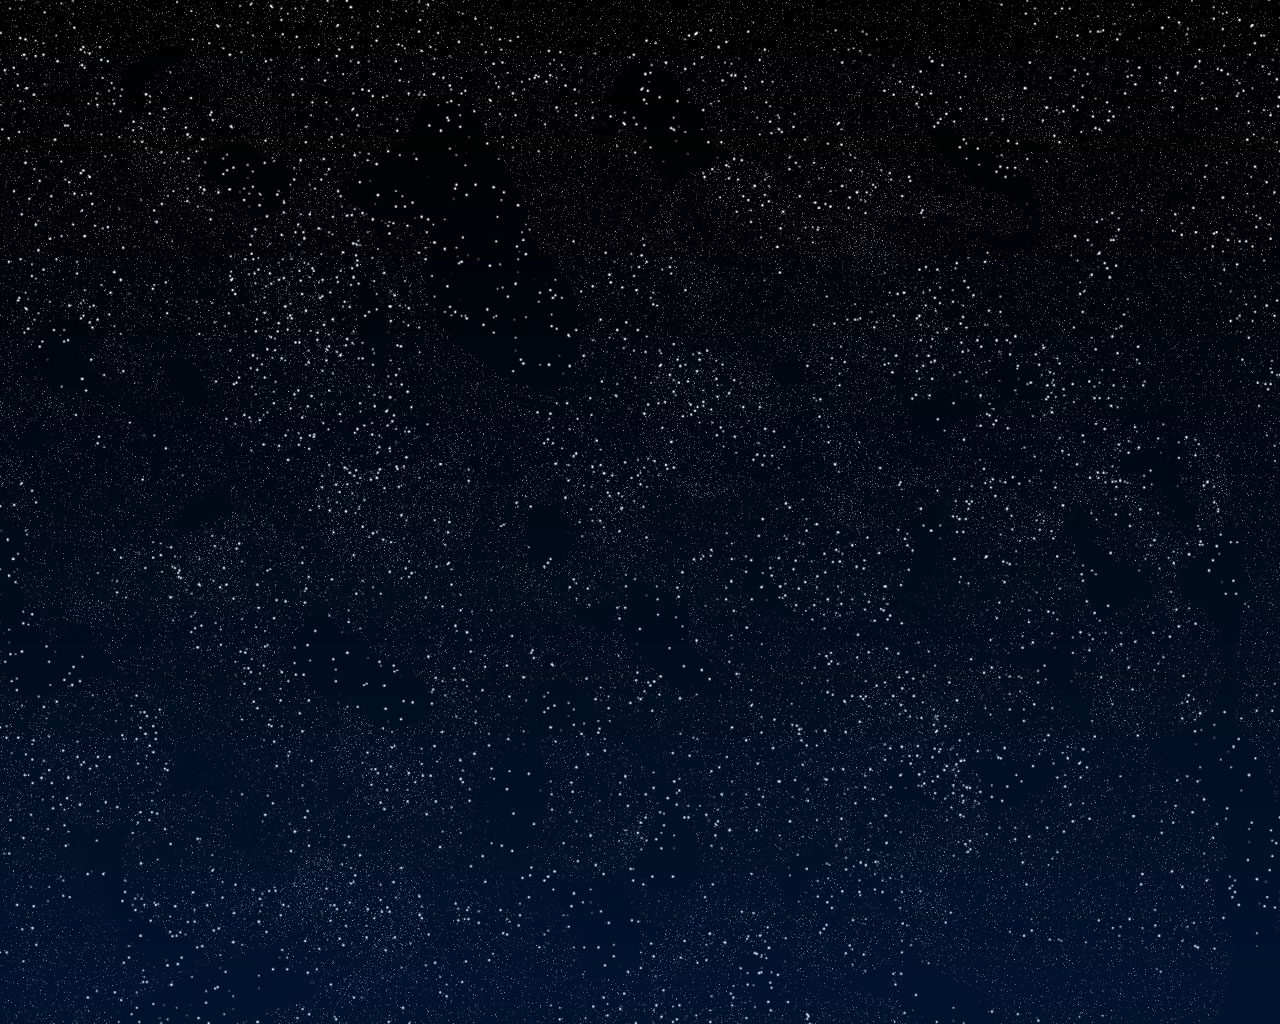
For this tutorial the first thing you need is a starry sky, you can find a good tutorial for creating a starry sky at www.artofgregmartin.com. Start witch a image with the size of 1280 x 1024px (if you use a different size you have alter all the layer style settings) Follow that tutorial till “adding glow”, we do not need the blue glow described in that tutorial. You should get a result like this:
Create a new layer (Ctrl+Shift+N) on top of the stars layer.
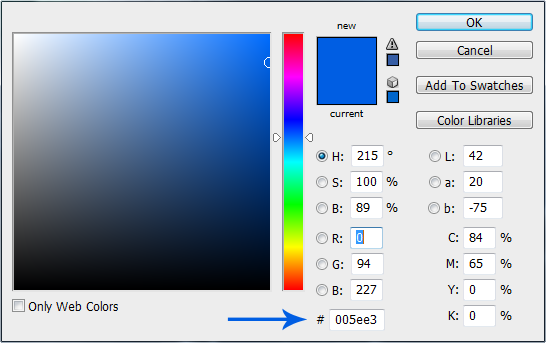
To create a bluish glow in the sky, first select a blue (#005ee3) color by clicking at the “Set foreground color” icon  . Set the blue color by copying the “005ee3” in the color picker menu and click OK.
Select the gradient tool ") (it might be hidden behind the paint bucket icon
(it might be hidden behind the paint bucket icon ) and select in the top menu the fading blue gradient (see picture).

Paint the gradient from bottom to top.
Change the opacity of this layer to 20% you can do this in the layers menu (press F7 if you can’t find it).
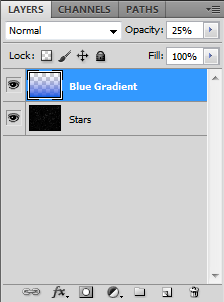
This menu is very important, the most upper layer will appear at the front of your image, in this case the blue gradient must be on the top of the layers menu, otherwise you will only see the stars layer. Your image should now look like this:
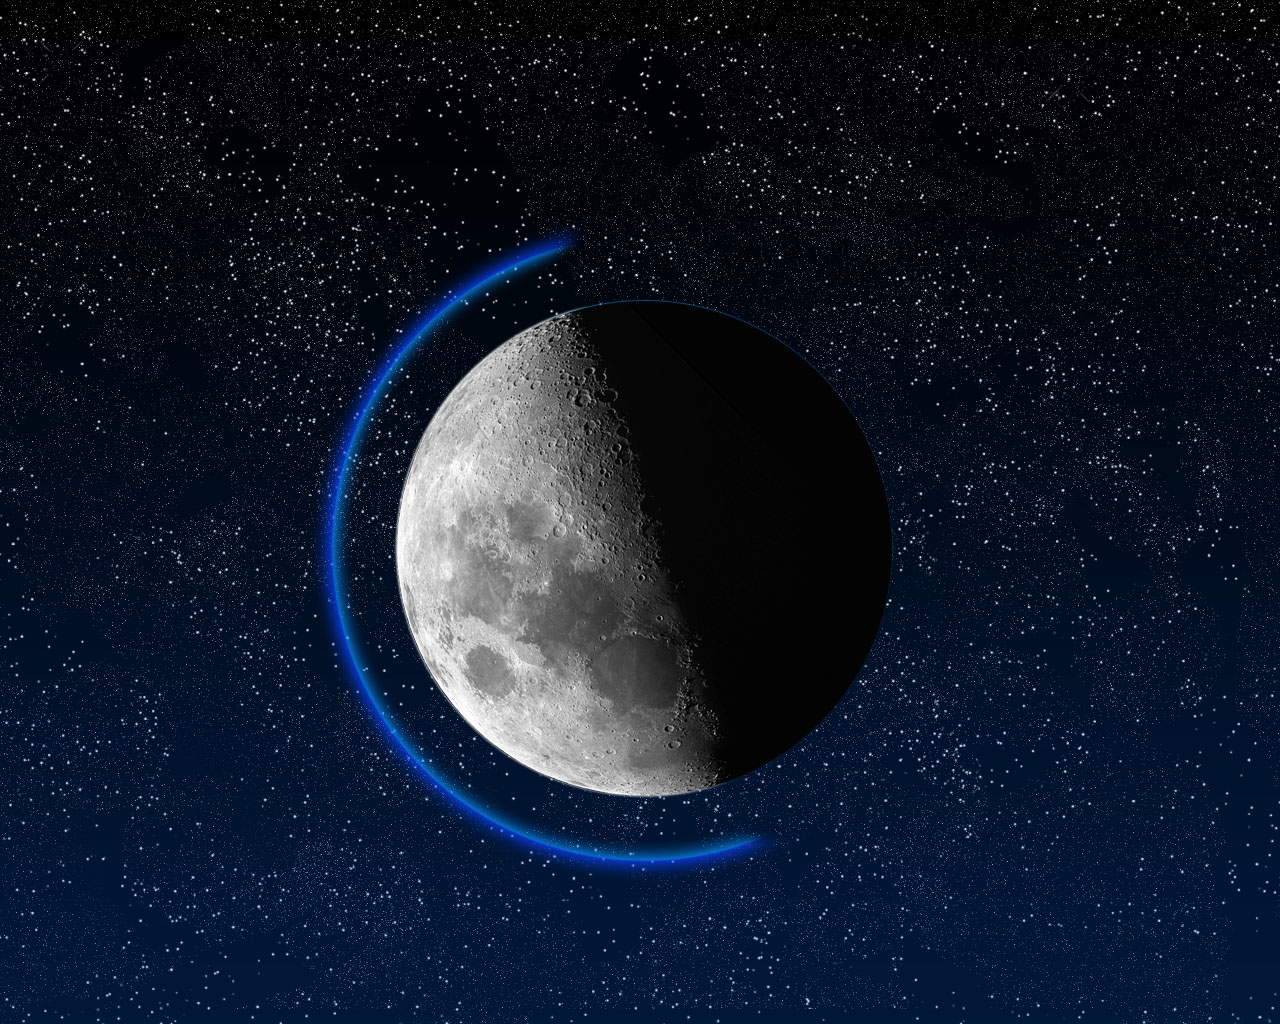
Step 2, Moon
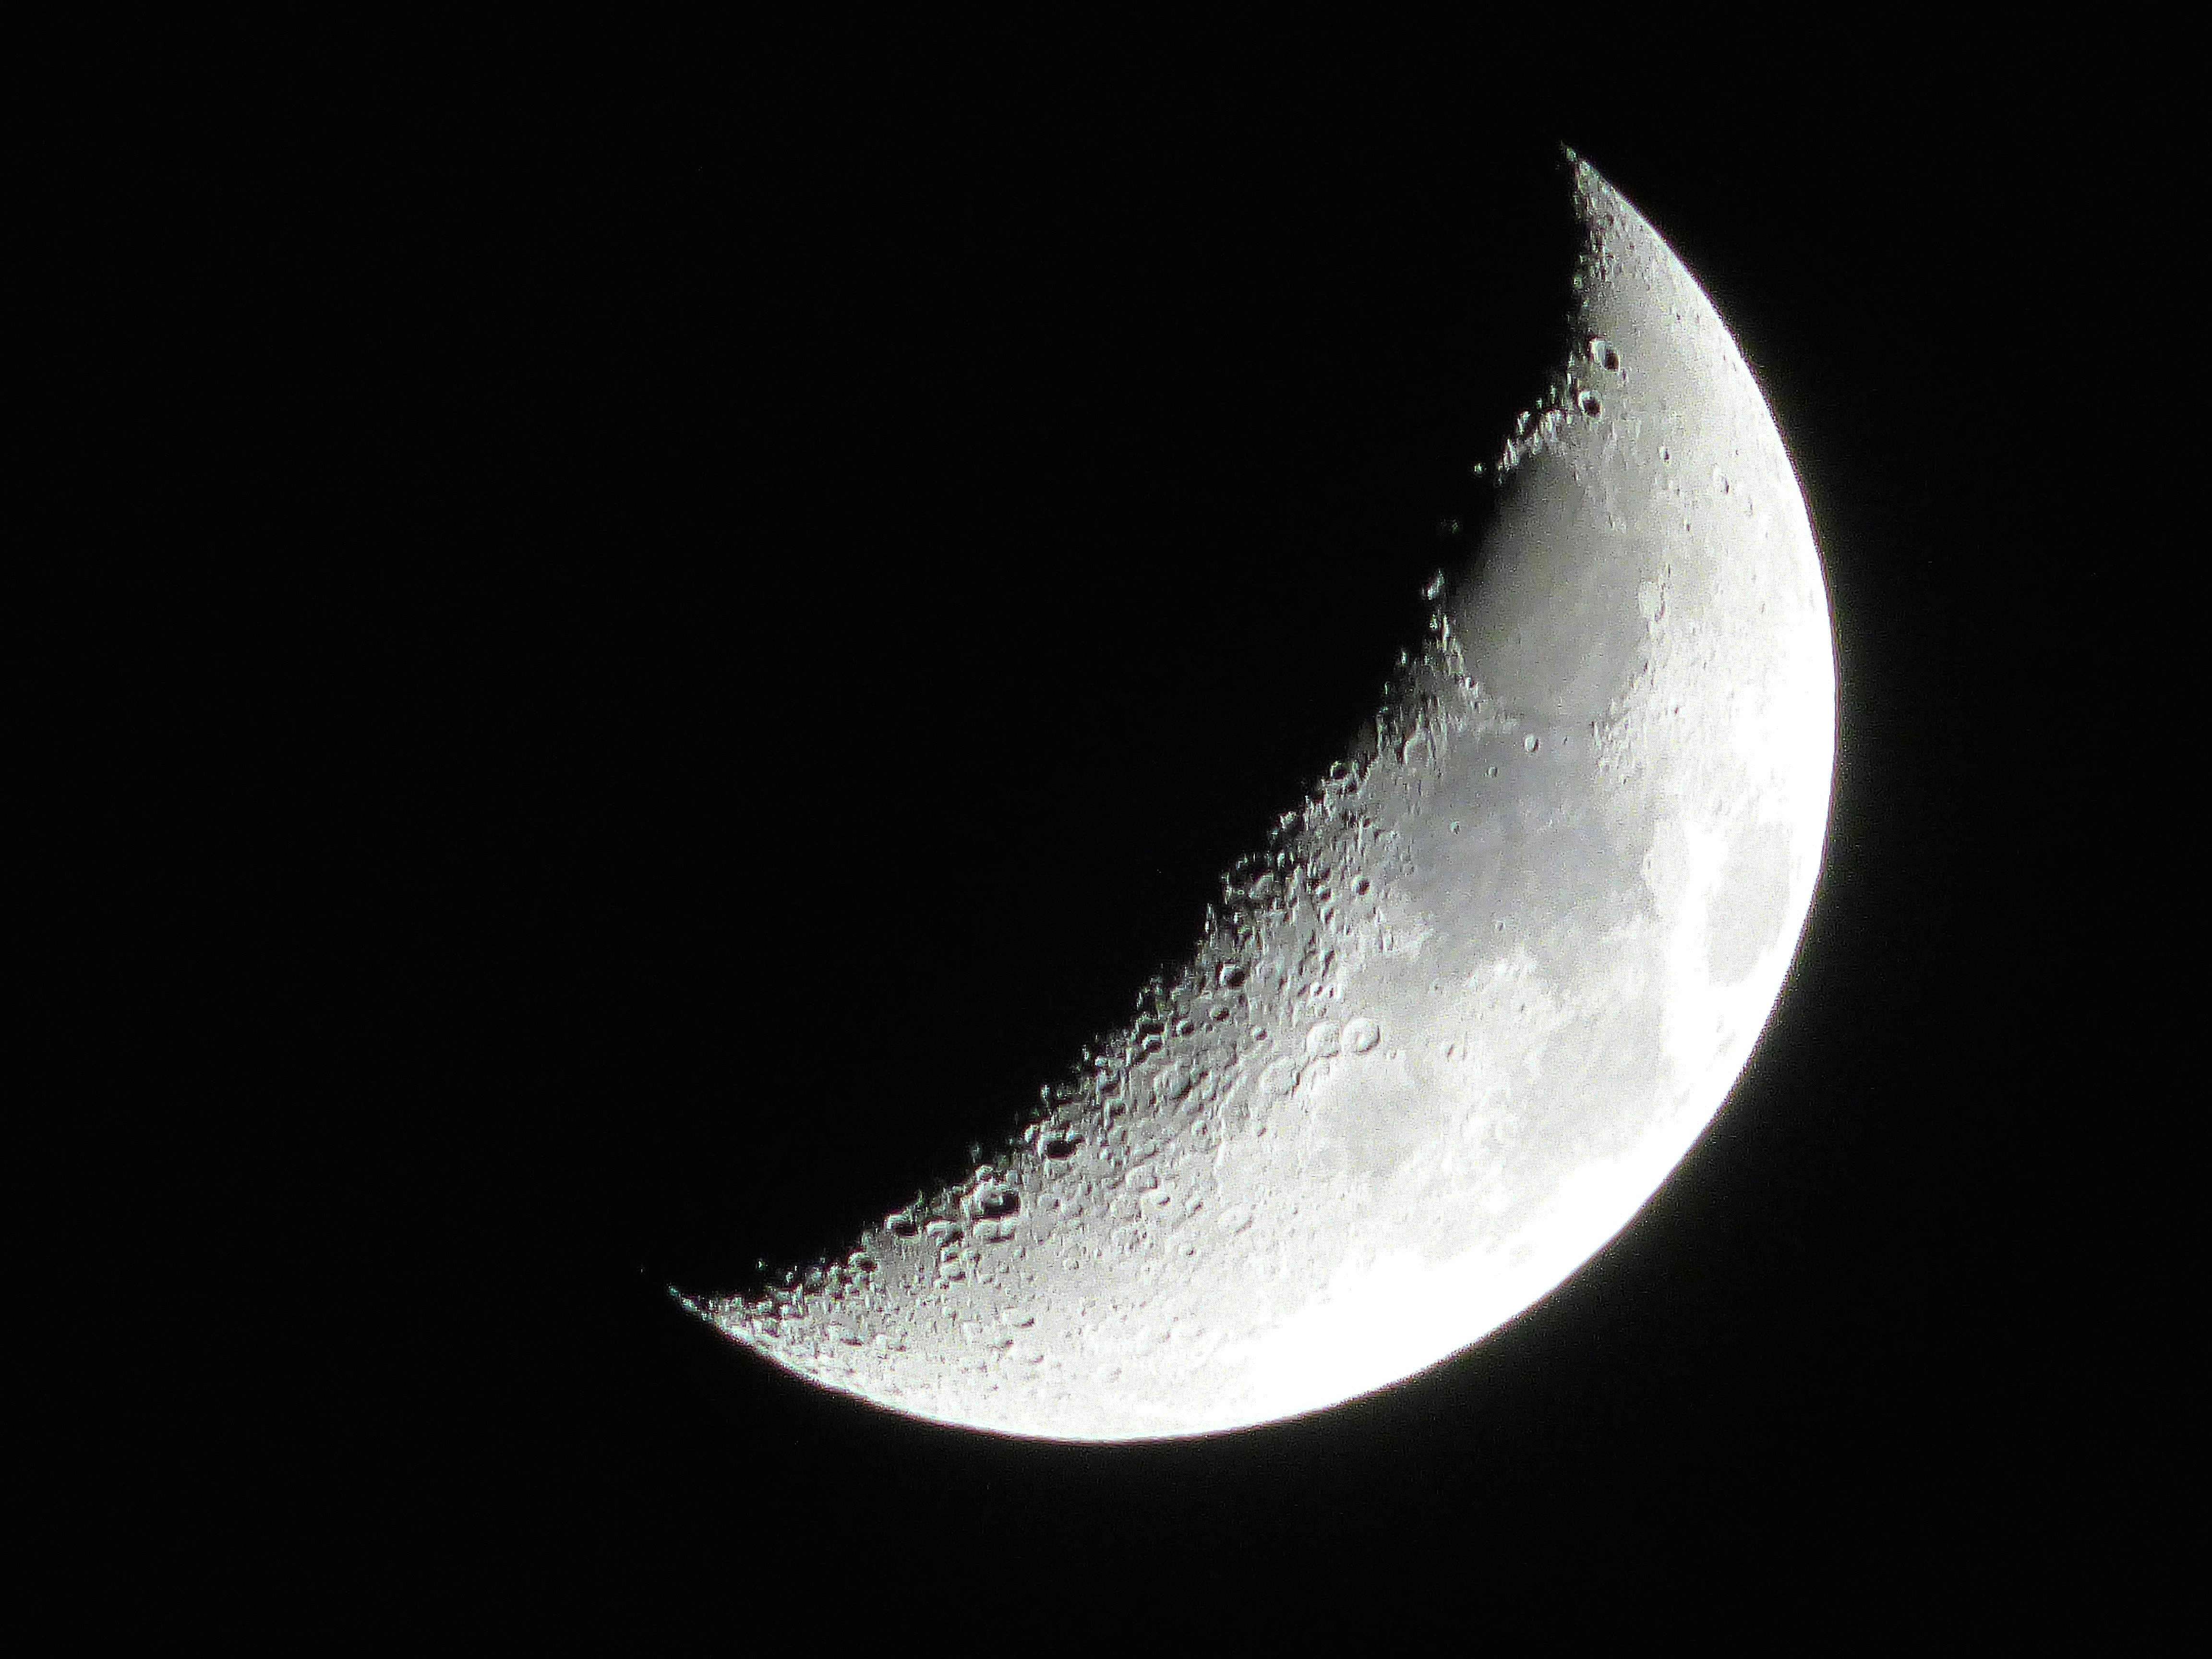
Now that we have the starry sky we can add the moon. You can find a nice photograph of the moon at for example this website: www.wikipedia.com. Open the picture as a separate file in Photoshop so we can modify it before we put it on our wallpaper. First scale the moon (Ctrl + T) so the illuminated and dark area of the moon can be selected subsequently. To keep the length/height ratio the same press Shift and Alt while scaling. You should get something like this:
Now use the paint bucket to fill up the dark side of the moon. For this, use the color (#040404).
There might still be a small uncolored line in our picture, use the Brush Tool  to paint this black.
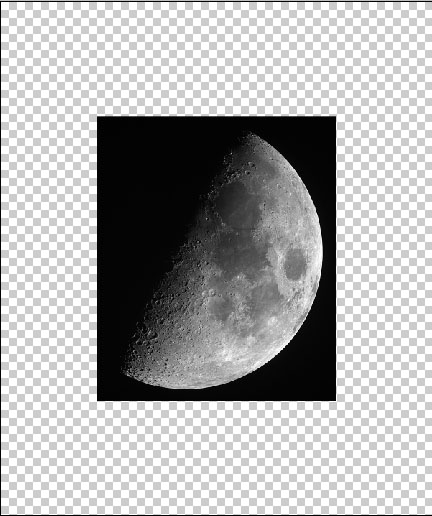
In the next step we want to select the moon only. You can do this with the Elliptical Marquee Tool  . Press the Shift and Alt button again to get a perfect round selection. First try to get a selection as big as the moon, then move the selection so it exactly fits around the moon:

Copy (Ctrl + C) the selection and paste (Ctrl + V) it in our starry sky. Give this new layer the name “Moon”. Rotate (Ctrl + T) the moon 135° to the right so the dark side of the moon is on the right. Scale the moon to approximately 30% of your image. Now you should have an image like this:
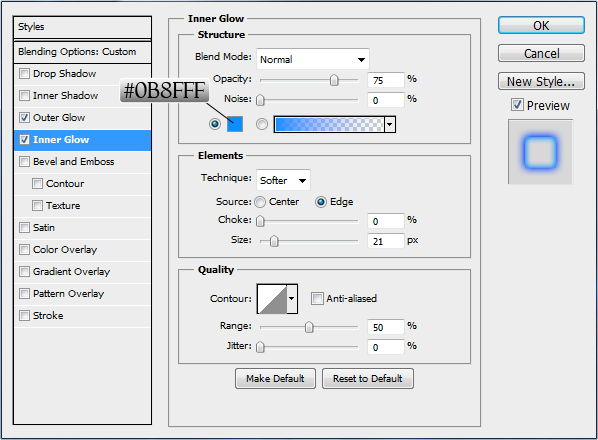
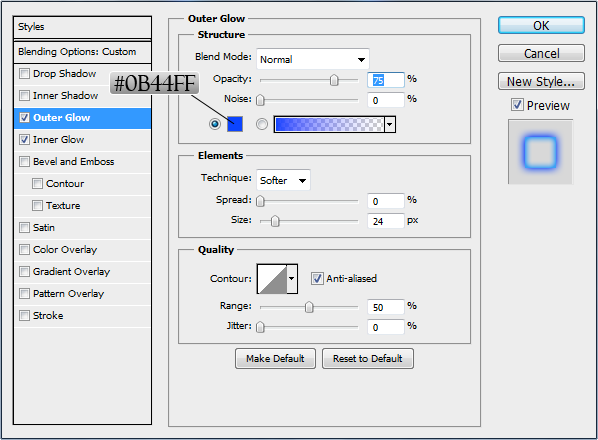
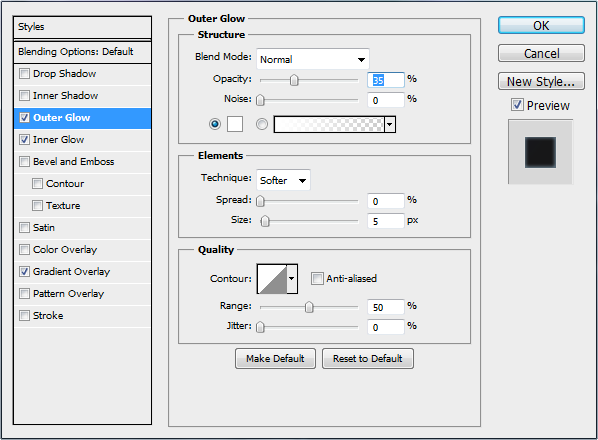
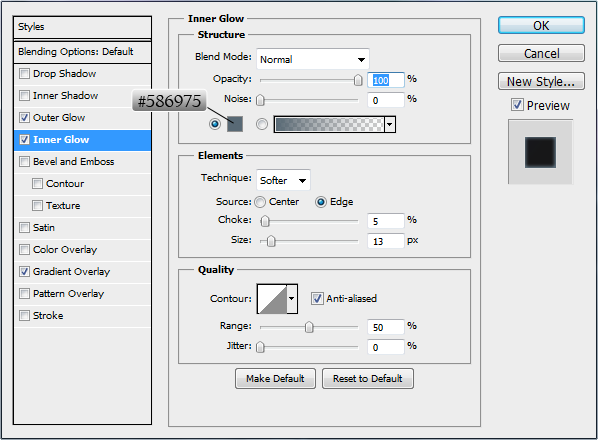
Next we will create a halo around the moon. Press Ctrl + J to make another copy of the moon layer. Rename this layer to “Moon Halo”. Enlarge this layer (Ctrl + T) and Push Shift + Alt while enlarging. Make this moon as big as you want the halo to be. Reduce the fill of the “Moon copy“ layer to 0%, this way only the layer style effects will be visible. Now we can create a inner and outer glow with the layer style. In the top menu click on layer>layer style>outer glow. You can also double click on the layer menu (just right beside the layer title). Now the adjust the layer style properties to match the pictures below:
Now you should have an image like this:

We don’t want to have the halo around the whole moon, so we are going to erase some of the halo. Right click on the “Moon halo” layer and choose “Convert to Smart Object”. Now take the Eraser Tool  with a Size of 100px and a hardness of 40%. When you start to erase, Photoshop asks if you want to Rasterize the Smart object, click OK to proceed. Now erase the halo at the dark side of the moon:

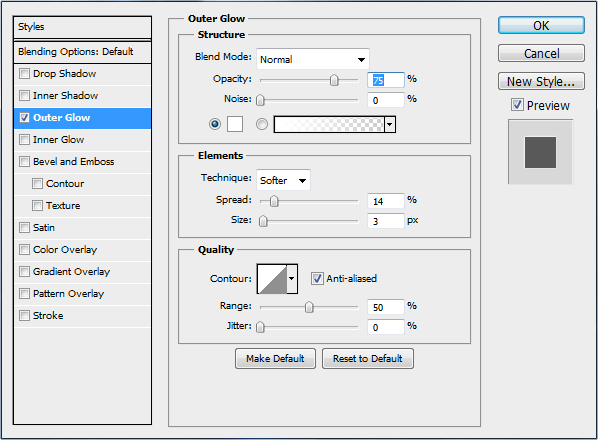
To make the moon blend in a bit better in our scene, we are going to make two more copies of the moon layer. The first one will be used to give the moon a white glow at the illuminated side of the moon, the other one to make a fancy blue glow at the edge of the dark side . select the “Moon” layer and press Ctrl + J, rename this new layers as “Glow White”. Match the layer style settings with the setting depicted below.
Now the whole moon has a white glow at both sides, we have to erase it. But first we have to put this “White Glow” layer underneath the “Moon” layer in the layers menu. Now take the eraser and remove the white glow.
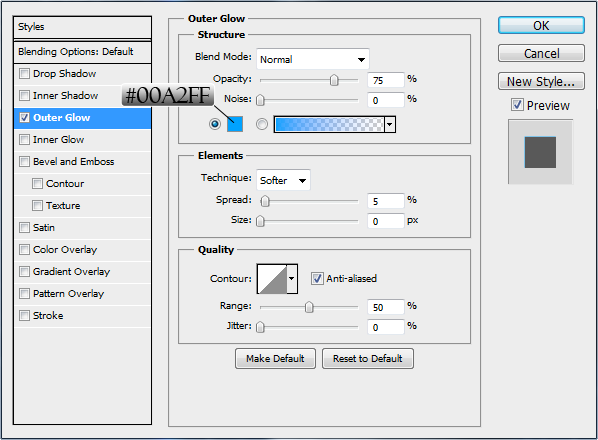
Do the same again, this time rename the layer to “Blue glow”, and give the layer style these settings:
Don’t forget to put this layer behind the “Moon” layer and erase the blue glow at the illuminated side of the moon.
The halo around the moon is a bit to bright, change the opacity to 25%. The moon is finished for now. To keep the layer menu clear you should put all the layers we used to create the moon in one group. Select the layers (press Ctrl to select them) and press Ctrl + G, the layers are grouped in “Group1”, change this name to “Moon”.
Step 3, Forest
Now we can start with the trees. Take the Custom Shape Tool  . In the options bar you see “shape:”
  .
Click on the dropdown menu and then click on the small round button
.
Click on the dropdown menu and then click on the small round button . Click on “Load Shapes…”. Navigate to the folder “C:\Program Files\Adobe\Adobe Photoshop CS5\Presets\Custom Shapes” and choose the Nature.CSH file. Now you should be able to select the tree shape.
Create a new layer and use the tree shape to create a forest in your image. Just create some big trees on the left and right and draw some smaller trees in the middle. You can use a new layer (Ctrl + Shift + N) for each tree you create, and at the end put all trees in one layer. This way you can move every tree around separately till you got it at the desired location.
. Click on “Load Shapes…”. Navigate to the folder “C:\Program Files\Adobe\Adobe Photoshop CS5\Presets\Custom Shapes” and choose the Nature.CSH file. Now you should be able to select the tree shape.
Create a new layer and use the tree shape to create a forest in your image. Just create some big trees on the left and right and draw some smaller trees in the middle. You can use a new layer (Ctrl + Shift + N) for each tree you create, and at the end put all trees in one layer. This way you can move every tree around separately till you got it at the desired location.

When you have drawn enough trees you can fill the empty parts at the bottom between the trees with the Brush Tool .
Now select all the layers with trees and press the right mouse button. And click at “Merge Layers”. Call this layer “Forest”.
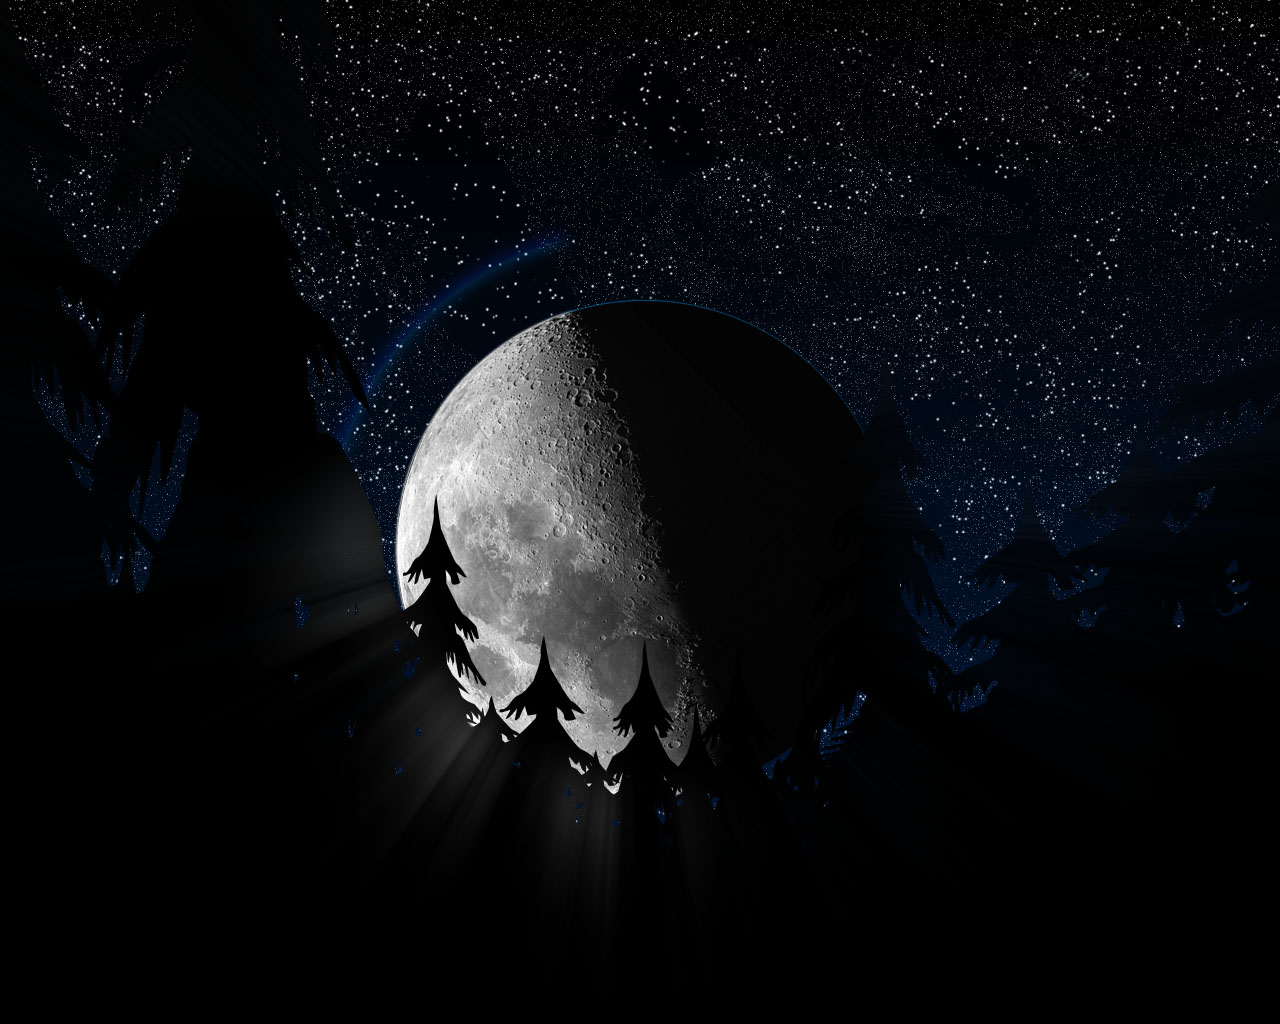
Step 4, Moonlight
The next step is to create light rays of the moon, this can be quite tricky, so safe your .psd file in case it goes wrong.
- Select all layers except the “Forest” layer and press the right mouse button and choose “Merge Layers”.
- Click on the “Forest” layer and press Ctrl + Alt + Shift and click at the layer thumbnail of the “Forest” layer, now all trees should be selected.
- Press Ctrl + Shift + I to invert the selection, only the sky is selected now.
- Select the “Sky” layer and press Ctrl + C to copy the moon and stars.
- Now press “Ctrl + Alt + Z” a couple of times until The “Sky” layer is not merged anymore. We want to be able to modify the separate layers if it is necessary.
- Create a new layer (Ctrl + Shift + N) call this layer “Moon rays” and paste the sky (Ctrl + V).
- Place the new created layer exactly in place on top of the other layers.
- Go to “Filter>Blur>radial blur…” and use the following settings:
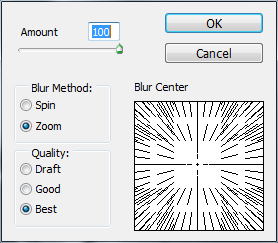
- Click OK and repeat this step once with the same settings.
- Press Ctrl + Shift + I and press Delete. This deletes the blurred moon, you should have some nice light rays of the moon now.
- Remove some of the light ray in the middle of your image on top of the moon with a big eraser (Size 400px hardness 40%). Blur the light rays, go to “Filter>Blur>Gaussian Blur…” set the Radius to 2.5 and click OK.
You should have something like this now:
Step 5, Blur trees
To create some depth in the image, we are going to blur the trees a bit. In the center of the image you don’t want the trees to be blurred. To accomplish this you can use the “Quick Mask Tool” select the forest layer and press “Q”. Now use a very big brush (Size 1000px, Hardness 0%) and paint a big dot in the middle of the image. You should see a big red dot (the Quick Mask Tool is active).
Press “Q” again to stop editing the quick mask. Go to “Filter>Blur>Gaussian Blur…” set the Radius to 2.5 and click OK.
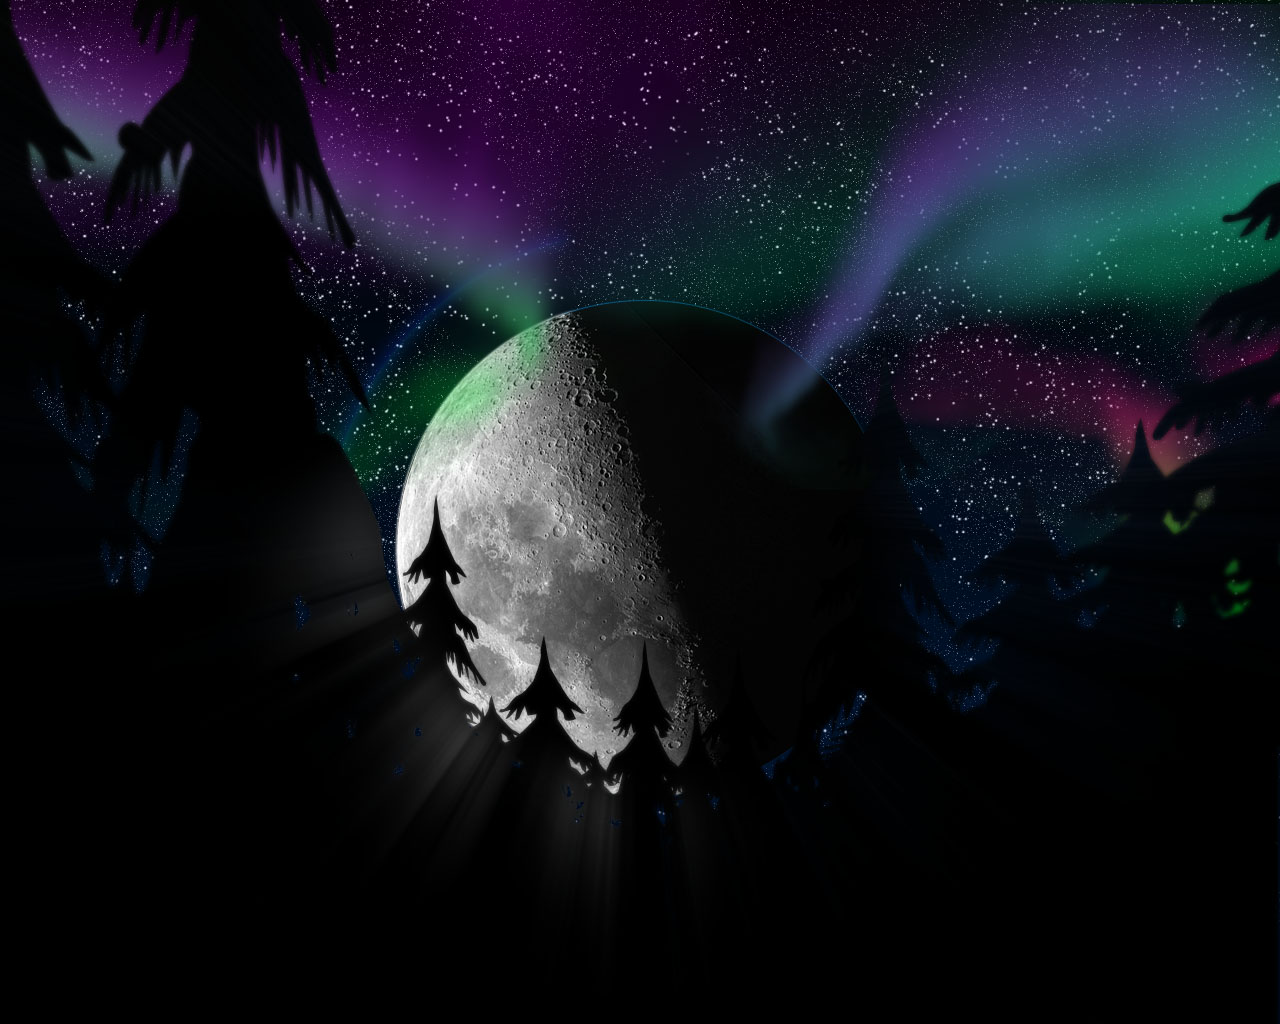
Step 6, Northern lights
Now the fun starts, we are going to add the northern light!
To draw the northern light you need the Aurora Borealis brushes, you can download them at www.obsidiandawn.com. Unzip the ZIP file and put the file in C:\Program Files\Adobe\Adobe Photoshop CS5 (64 Bit)\Presets\Brushes.
In Photoshop, take the brush tool and open in the options bar the dropdown menu and then click on the small round button . Choose “Load Brushes…”. Select the SS-aurora file and load this brush set.
Choose a bright green color  ( so you can clearly see what you do) and aurora borealis brushes you like, and draw some northern lights. Draw every northern light at a separate layer so we can edit the layer style for every layer separately.
Open the layer style menu of each layer and add a gradient overlay to every layer. You can change the gradient color by clicking at the gradient, and then double click at the small square below the gradient (see images).


Add a nice gradient to every northern light, just play around with the gradient colors, you should also change the angle of the gradient!
When you finished your northern light, put all the layers in one group by selecting the layers and pressing Ctrl + G, rename this group to “Northern Lights”.
Step 7, Mountains
We want some snowy mountains at the background, take the paint brush and draw some mountains at the left and right of the moon. Do this in two different layers, some closer mountains should be in a separate layer.
open the layer style menu for one of the layers and the following layer styles:

Step 8, Big stars
The next step is very simple, create a new layer, load the “Assorted brushes” and select the X shaped brush and draw some big white Stars in the sky. Your image should now look like this:

Step 9, Campfire
The picture looks nice already, but to make the picture interesting you can add small details.
A campfire is can bring some warmth in the cold winter. Use your favorite search engine to find a picture of a camp fire and remove all the black around the fire with the eraser. Take the Brush tool to paint the glow around the fire (size: 140px, hardness: 0%). Use the color #ff5a10 for the whole area around the fire, and #ffc807 in another layer only close to the fire. Set the opacity of both layers to ca. 40%. Rename these layers to “Fire Glow Orange” and “Fire Glow Yellow”. Add some sparks with the Brush tool , use a brush size of 1px and draw of curved line. Apply a gradient from orange via red to yellow with the layer style.
Draw two trees beside the fire with the Custom Shape Tool and apply a black to orange gradient with a layer style. This way it seem like the light of the fire shines on the trees. Draw two more black trees in a higher layer so they form a silhouette. You can also draw silhouette of a sled.
Your image should look like this:
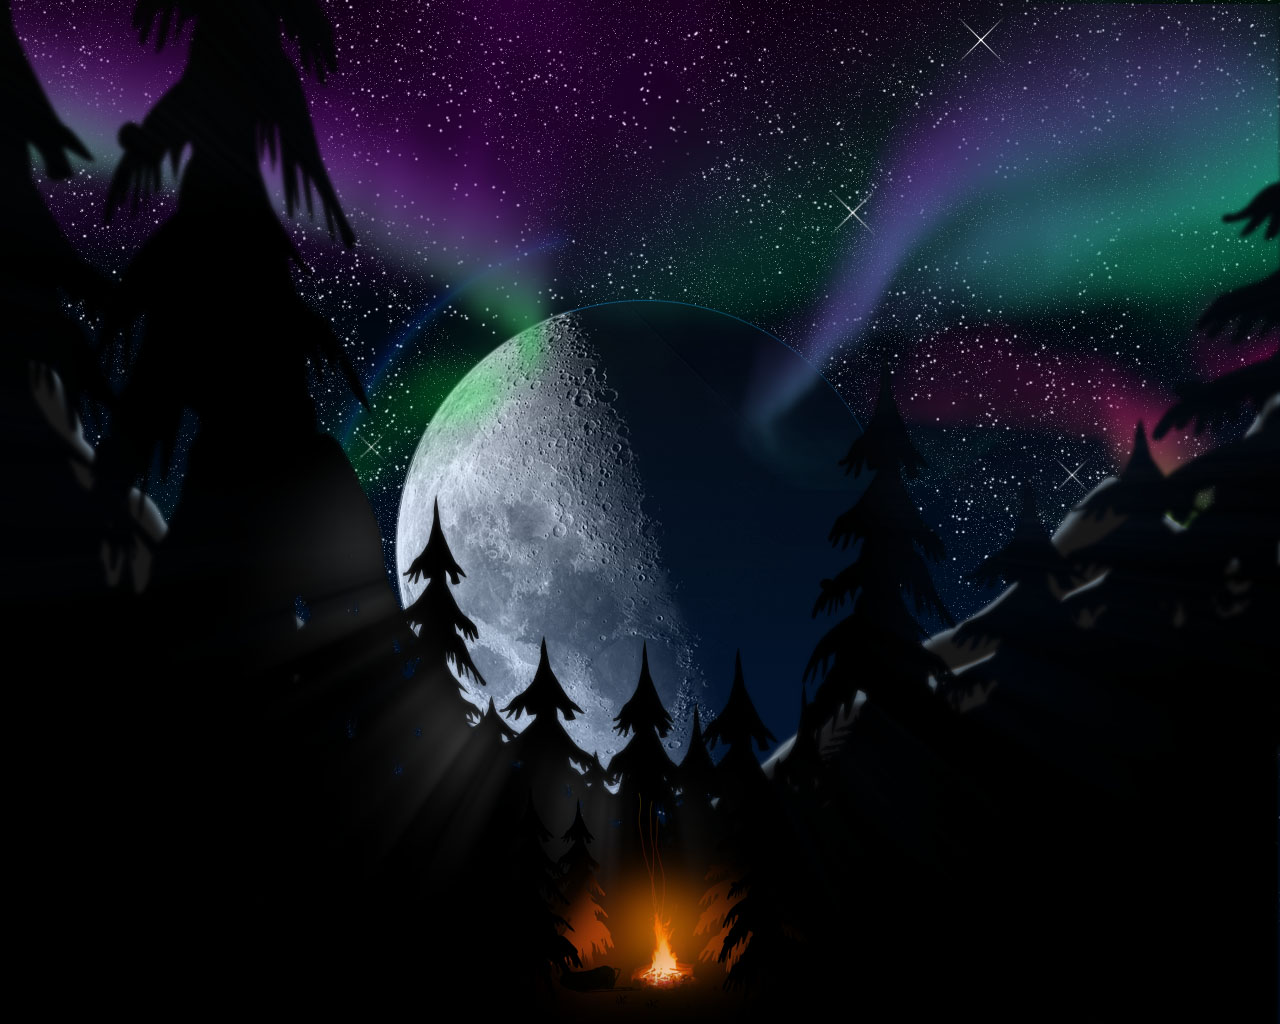
Step 10, Adjust blue gradient
At this point you can see that the moon is a bit to bright, you can easily change this by moving the Blue gradient layer up in the layers menu, so it is above the Moon group in the layer menu. Now the moon is behind the blue atmosphere and looks more realistic.
Step 11, Wolf face
You can put a drawing of a wolf in front of the moon, which you can only see of you look carefully.

This image is created by extracting the white pixels from this image: www.sonataarctica.info. Because the extraction option is not available in Photoshop CS5 anymore (it is replaced by the edge refine function), you can just use the picture above.
Safe this picture at your computer and open it in Photoshop (dragging it in to Photoshop might give the layer an unwanted black background). Paste it on your image on a new layer on top of the Moon layer (underneath the Blue gradient layer) and move it on top of the moon. Duplicate this layer (Ctrl + J) and erase the right part of the duplicated layer only at the dark part of the moon. Change the opacity of this layer to 50%. Change the opacity of the original layer to 8%. Group the 2 layers and call this layer "Wolf".
Step 12, Shooting star
To make the scene complete you can add a shooting star by doing this tutorial: www.t-tutorials.com
Now all the work is done!
Just add the logo of your favorite band and you got yourself a nice wallpaper. I hope you learned a lot about Photoshop.
Good luck,
Bart
Add a Comment
It looks so easy this way. Where did you get the moon pic? Don't understand, is it also a standard pic (just like the trees)?
Hi Paintshop pro, I got the moon image from www.celestialimage.com/page150.html. It is not a standard pic like the trees. Good luck with the tutorial!